Electrical Work in New Building Apartments (Moscow)
Moving into a new build apartment in Moscow brings many advantages — modern layout, new systems — but the electrical installation still needs careful attention. This guide explains the key stages, local considerations, safety requirements and practical tips to get a safe, convenient and code-compliant electrical system in your new Moscow apartment.
1. Why proper electrical work matters
— Ensures safety for family and property (prevents shocks, fire).
— Provides reliable power for appliances and future upgrades (EV chargers, HVAC, automation).
— Avoids disputes with the developer and reduces renovation rework.
— Necessary for correct metering, legal connection and warranty preservation.
2. Key stages of electrical work
1. *Design and load calculation* — determine circuits, cable sizes and protection.
2. *Coordination with developer / grid operator* — confirm meter placement and connection rules.
3. *Rough-in (in-wall wiring)* — laying cables, mounting boxes before finishing.
4. *Installation of distribution board* — breakers, RCDs, busbars.
5. *Final wiring and outlets* — switches, sockets, fixtures.
6. *Testing and commissioning* — insulation, continuity, RCD tests.
7. *Documentation and handover* — as-built diagrams, test reports, warranty.
3. Design and local regulations to consider
— Work must follow Russian norms such as *PUE (Правила устройства электроустановок)* and relevant GOST and construction rules.
— If you plan significant changes (e.g., increasing capacity, adding a stove/hob, re-routing panels), involve a licensed electrical designer or certified electrician.
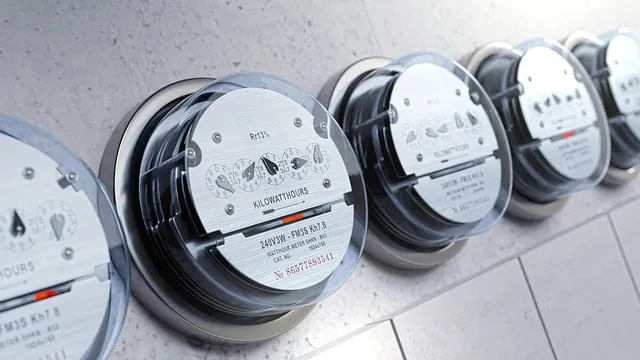
— Coordinate meter installation and sealing with your energy supplier (Moscow energy company or управляющая компания) — incorrect meter placement can cause delays.
4. Recommended materials and typical cable sizes
— Use quality cables with certification (NYM, VVG-ng or approved equivalents).
— Typical conductor cross-sections (general guidance; final selection by engineer):
— Lighting circuits: 1.5 mm²
— General sockets: 2.5 mm²
— Kitchen sockets / heavy appliances (oven, kettle): 4 mm²
— Electric stove or electric heater (if single-phase): 6 mm² or as specified
— Dedicated high-power loads or three-phase equipment: sized per calculation
— Use residual-current devices (RCD / УЗО), surge protection and correctly rated automatic breakers (автоматы).
— Install copper or approved grounding conductors and equipotential bonding.
5. Distribution board and protection
— Provide separated circuits for lighting, sockets, kitchen appliances, washing machine, HVAC and boiler.
— Use RCDs for circuits in wet zones (bathroom, kitchen) and sensitive circuits.
— Consider type-B or C curve breakers depending on load characteristics (motors vs. resistive loads).
— Label all DIN-rail breakers clearly and keep an as-built panel diagram.
6. Grounding and earthing
— Ensure the building grounding system is verified at handover. Apartments typically rely on building earthing — check continuity and resistance.
— Equipotential bonding required in bathrooms and near water installations.
— For additional safety or if building earthing is insufficient, consider supplementary protective measures (consult a specialist).
7. Metering and legal connection
— Follow your energy supplier’s rules for meter placement, sealing and metering schemes.
— If the apartment requires increased capacity or a separate phase, initiate the technical conditions (ТУ / технические условия) with your grid company early.
— Do not tamper with the developer-installed meter or seals — this can void warranty and cause legal issues.
8. Safety tests and acceptance
— Required tests include insulation resistance, continuity, loop impedance, and RCD trip time.
— Obtain written test reports and a signed acceptance protocol. These documents are essential for warranty claims and future modifications.
— Keep receipts, certificates for materials and licenses of contractors.
9. Practical layout and ergonomic tips
— Standard socket height: ~30 cm from floor (adjust for furniture/appliances).
— Switch height: 90–100 cm from finished floor for comfortable reach.
— Plan sockets above kitchen counters and for appliances (fridge, microwave, washer) with dedicated circuits.
— Add spare conduits or empty sleeves to enable future upgrades without major demolitions.
— Consider lighting zones and dimmers in living spaces for comfort and energy savings.
10. Smart home, extras and future-proofing
— Plan for smart lighting, HVAC controls, access control, and TV/data points during rough-in.
— Install separate low-voltage conduits for data (CAT6/7) and audio-video to avoid interference.
— Consider a small reserve in the distribution board for future breakers and a space for a smart-home hub.
11. Typical timeline and cost considerations (Moscow, approximate)
— Timeline: design & permits — 1–3 weeks; rough-in & panel installation — 1–2 weeks; finishing & final wiring — 1 week; testing & handover — a few days.
— Costs vary widely depending on apartment size, finishing level and materials. Obtain 3 quotes and check included services (materials, testing, documentation).
— Always balance price against electrician qualifications, insurance and warranty.
12. How to choose a contractor (checklist)
— Valid electrician license or company registration and insurance.
— Portfolio of similar apartment projects and references.
— Written estimate with scope, materials, timelines and warranty.
— Provides test reports and as-built wiring diagram at completion.
— Uses certified materials with manufacturer warranties.
13. Handover checklist for homeowners
— As-built wiring diagram and single-line diagram of the distribution board.
— Test results and commissioning protocol.
— Receipts and certificates for materials (cables